Its been a little while since we completed our middles room and so I thought I would share a few behind the scenes images with you all on how it all came to be!
You might not remember but her room used to look like this below
 I had an idea to make the space a bit softer and so we started by painting over the Sharpie wall and tearing up the carpet to the subfloor.
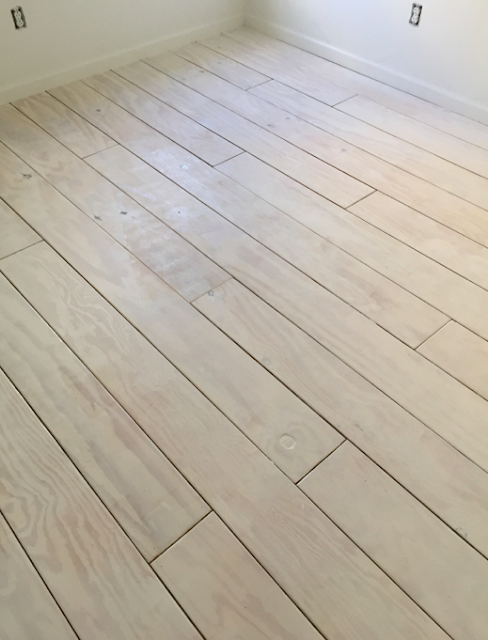
 Once we had new white paint on the walls it was time to lay the plywood plank floors and install the Chasing Paper wallpaper.

 Before any project I always create a design board so that I can visualize the entire space and I don't waste time purchasing items that I end up not loving once I see them all in the space together.
 Of course the board is always tweaked a little as I go and because I am always working on a budget I have to improvise as the project is completed. I still incorporated all of the colors in to the finished space but some of the items changed. Instead of a white bed with mint green bedding, I flip flopped the look and painted her existing bed green and used white bedding. This was huge when it came to cost. I always try to use what I have before purchasing new items. Shopping your own home is always the best way to start when you are styling a space.


You might not remember but her room used to look like this below


After these steps were completed it was on to planking all of the walls and painting the planks white.


I found the perfect mint green paint below at hobby lobby and the application was super easy and not much over spray at all. Two coats the red was gone!
The one thing I wanted to add to her room was this dresser from The Land of Nod. But at $1299 it just wasn't in the budget so I started thinking that I would just recreate the look myself. Using the dresser she already had in her room. I used frog tape on the front to create the pattern similar to the LON dresser.

The design was far from perfect but after a few tries I was fine with it....I stopped going for "perfect" a long time ago.
The next step was to paint over the tape with my favorite primer HERE. If you follow the directions this stuff will stick to anything and considering I didn't prepare the dresser for painting by sanding it, I needed to make sure this stuff was going to stick!

I let it sit for a week and then pulled off the tape. I didn't paint over it but instead used a polyurethane to seal it.

The two side by side. I still love the lighter one but saving myself $1299 was worth it!

Im still over the moon with how the space turned out. Its a small room and so I had to be creative with the design so it didn't feel crowded or over done. I needed a real plan for the space and stick to it so that I didn't find myself purchasing things that ultimately wouldn't work and wasting time and money in the process. I also knew that if I didn't have a design we both loved that I would end up changing it again and that would make for a grumpy husband and I didn't want that!


